Hacking iOS Simulator with simctl and dynamic libraries
This article based on the talk I gave on Cocoaheads Kyiv #15 in 2019. It’s an overview of how to inject custom code into iOS Simulator with simctl.
All code examples written in Objective-C.
When building products for engineers, you should always consider a “flow” factor. You don’t want to be yet another distraction. So when we were building Flawless App1 we started with Xcode & iOS Simulator integrations. Flawless App is a tool to compare iOS app design & implementation in real-time, search for visual bugs, and prevent regressions. It was important to connect to iOS Simulator and overlay design with different filters. Almost as it was a default Simulator’s feature.
Surely there was no official documentation to make this happen. iOS Simulator was never a platform to build on top of. After numerous trials and errors, I found a way to inject our code into Simulator as the “plugin”. It was practically a dynamic library, loaded into one of iOS’s native processes.
Here is our today’s agenda.
- Intro to
simctl. What is it about, and how does it work? - Method swizzling. Modify code you don’t own.
- Building dynamic iOS libraries.
- Injecting library into Simulator.
Intro to simctl
The simctl is a command-line tool that comes bundled with Xcode. It allows basic interactions with the iOS Simulator. To access simctl directly, run the following script in the terminal.
$ xcrun simctl

Command line utility to control the Simulator
xcrun is another command-line tool which makes it easier to run all kind of scripts in Xcode. If you’re curious, you can find a simctl at Xcode.app/Contents/Developer/usr/bin/simctl
Important note: Simulator isn’t an Emulator. Practically Simulator is a macOS application. All its active processes are accessible from macOS. You can simply type SpringBoard in Activity Monitor and see its details.
I encourage anyone to dive deeper into the simctl documentation. Highly recommend WWDC 2020: Become a Simulator expert session or simctl overview by NSHipster as an introduction. Even without injecting anything into Simulator, using simctl can go a long way.
However, let’s focus on our original task. Here is a few important commands that will come handy later:
simctl list
As the name suggests, simctl list returns a list of Simulators. If you want to interact with a specific iOS Simulator, you’d need to know its UDID.
$ xcrun simctl list -j [devices|devicetypes|runtimes|pairs]
The -j parameter sets the output to be formatted as JSON. Below is an output example, an array of runtimes, installed devices, and their details.
{
  "devices" : {
    "com.apple.CoreSimulator.SimRuntime.watchOS-5-2" : [
      {
        "state" : "Shutdown",
        "isAvailable" : false,
        "name" : "Apple Watch Series 2 - 38mm",
        "udid" : "3159F9D3-694F-44C6-A471-BD7856B5CF47",
        "availabilityError" : "runtime profile not found"
      },
      ...
    ],
    ...
  }
Knowing UDID you can then interact with a specific Simulator. For example, shutdown a certain device from the command-line
$ xcrun simctl shutdown 3159F9D3-694F-44C6-A471-BD7856B5CF47
Additionally to UDID simctl gives you alias booted to interact with active Simulator. This alias should be used cautiously though. Since Xcode 9 the user can launch many Simulators simultaneously. In such a situation, booted alias forwards the request to the last active Simulator.
simctl spawn
The spawn is one of those commands that make iOS Simulator plugins a reality. In simple words, spawn is launching certain processes/scripts in the system. Following the path below you can find various internal scripts/tools bundled with iOS Simulator Runtime.
Xcode.app/Contents/Developer/Platforms/iPhoneOS.platform/Developer/Library/CoreSimulator/Profiles/Runtimes/iOS.simruntime/Contents/Resources/RuntimeRoot/usr/....
Those tools include:
log– a tool to interact with internal iOS Simulator logs.leaks– a tool to inspect a process for possible memory leaks.malloc_history– a tool to display allocation histories for the selected process.
To launch any of those tools simply type:
$ xcrun simctl spawn booted <NAME OF THE TOOL>
What’s more important is that now you also have access to launchctl. This is a service that manages all the daemons, scripts, and apps in the system.
$ xcrun simctl spawn booted launchctl
Method swizzling
Another handy tool in our arsenal is method swizzling. Put it simply, swizzling means replacing the implementation of code you don’t have direct access. I should mention though swizzling isn’t a requirement for Simulator plugins. However, most of the time changing system behavior can unlock great possibilities.
Under the hood the concept of method swizzling based on Objective-C runtime. I’m not going to dig deep into the topic now. This can easily become a separate article. Instead, let’s get to minimal swizzling knowledge for our needs.
Starting with some basic terminology. Each class has a so-called dispatch-table. This table maps which selector corresponds with function/implementation. Each row in dispatch-table defines Method, Selector, and IMP. Let’s say we have the following example:
@interface HelloRuntime: NSObject
- (void)hello:(NSString *)text;
@end

@implementation HelloRuntime
- (void)hello:(NSString *)text {
	NSLog(@"Hello, %@!", text);
}
@end
In this case, a simplified representation of dispatch-table would be:
[ Method: "hello" ] → [ Selector: @selector(hello:) ] → [ IMP: NSLog(@"Hello, %@!", text) ]
As an example, let’s say we want to replace the implementation of hello: method to always print the same string in NSLog(). Here comes Objective-C Runtime. It allows us to change dispatch-table during the execution. So to replace the implementation of hello: we simply need to add a new dispatch-table record with Original Selector mapping to our alternate implementation, and Selector of alternate method mapping to the original implementation. This is done to prevent the breaking chain of calls. When replacing implementation you can’t easily tell whether any other methods depend on the original method being called at the right time.
- (void)alt_hello:(NSString *)text {
	[self alt_hello:@"Hello, Injection!"]

	// DO NOT CALL original [hello:] here as it will lead to infinite loop
	// [self hello:@"Hello, Injection!"];
}
The basic setup is ready. Now let’s change the dispatch-table records with Objective-C runtime.
First and foremost, all swizzling operations better execute as soon as class loads itself into memory. This way we can avoid having instances with different dispatch-tables. There is a convenient static method load for it. Additionally, to ensure we modify dispatch-table only once we’ll be using dispatch_once.
+ (void)load {
	static dispatch_once_t onceToken;
	dispatch_once(&onceToken, ^{
		...
	});
}
First, we’d need to get the Class of interest. So runtime would know which dispatch-table we try to modify.
Then get Selectors for original and alternative methods. Having those in place we can easily switch implementations.
+ (void)load {
	static dispatch_once_t onceToken;
	dispatch_once(&onceToken, ^{
		Class class = [self class];

		SEL originalSelector = @selector(hello:);
		SEL swizzledSelector = @selector(alt_hello:);

		Method originalMethod = class_getInstanceMethod(class, originalSelector);
		Method swizzledMethod = class_getInstanceMethod(class, swizzledSelector);

		method_exchangeImplementations(originalMethod, swizzledMethod);
	});
}
So here we have it. Whenever the system calls hello:, an alternative implementation of alt_hello: runs. And whenever alt_hello: gets called – original implementation of hello: is executed.
Building dynamic iOS libraries
iOS Simulator plugins are technically just dynamic libraries. Those libraries are being injected into a specific process before it starts. The basic property of dynamic libraries is that they can be loaded on demand. Unlike the static libraries that have to be loaded during the application start only.
Another core difference, the static library has to be present inside the executable. Obviously, the actual executable becomes bigger & slower to load. Dynamic libraries stored in executable as references. So the code from dynamic library loads from a specified location in the system.
Whenever the system starts application it loads code and resources into the memory. In the meantime, the system also starts a dynamic loader (dyld in macOS) for this new process. Then dynamic loader searches for necessary libraries per reference. It uses environment variables to know where to search for libraries. There are several variables available:
DYLD_LIBRARY_PATH– dynamic loader tries to search for libraries specified here before looking for system libraries.DYLD_FALLBACK_LIBRARY_PATH– this is the second path dynamic loader considers. In case there were no libraries found inDYLD_LIBRARY_PATH.DYLD_INSERT_LIBRARIES– libraries at this path will be loaded before those specified by the application. That means libraries at that path are temporary. Because they will be available only as a part of the current session.
The last variable is the one of interest for us. It’s temporary. You don’t want to break iOS Simulator forever because of your plugin, do you?
Injecting library into Simulator
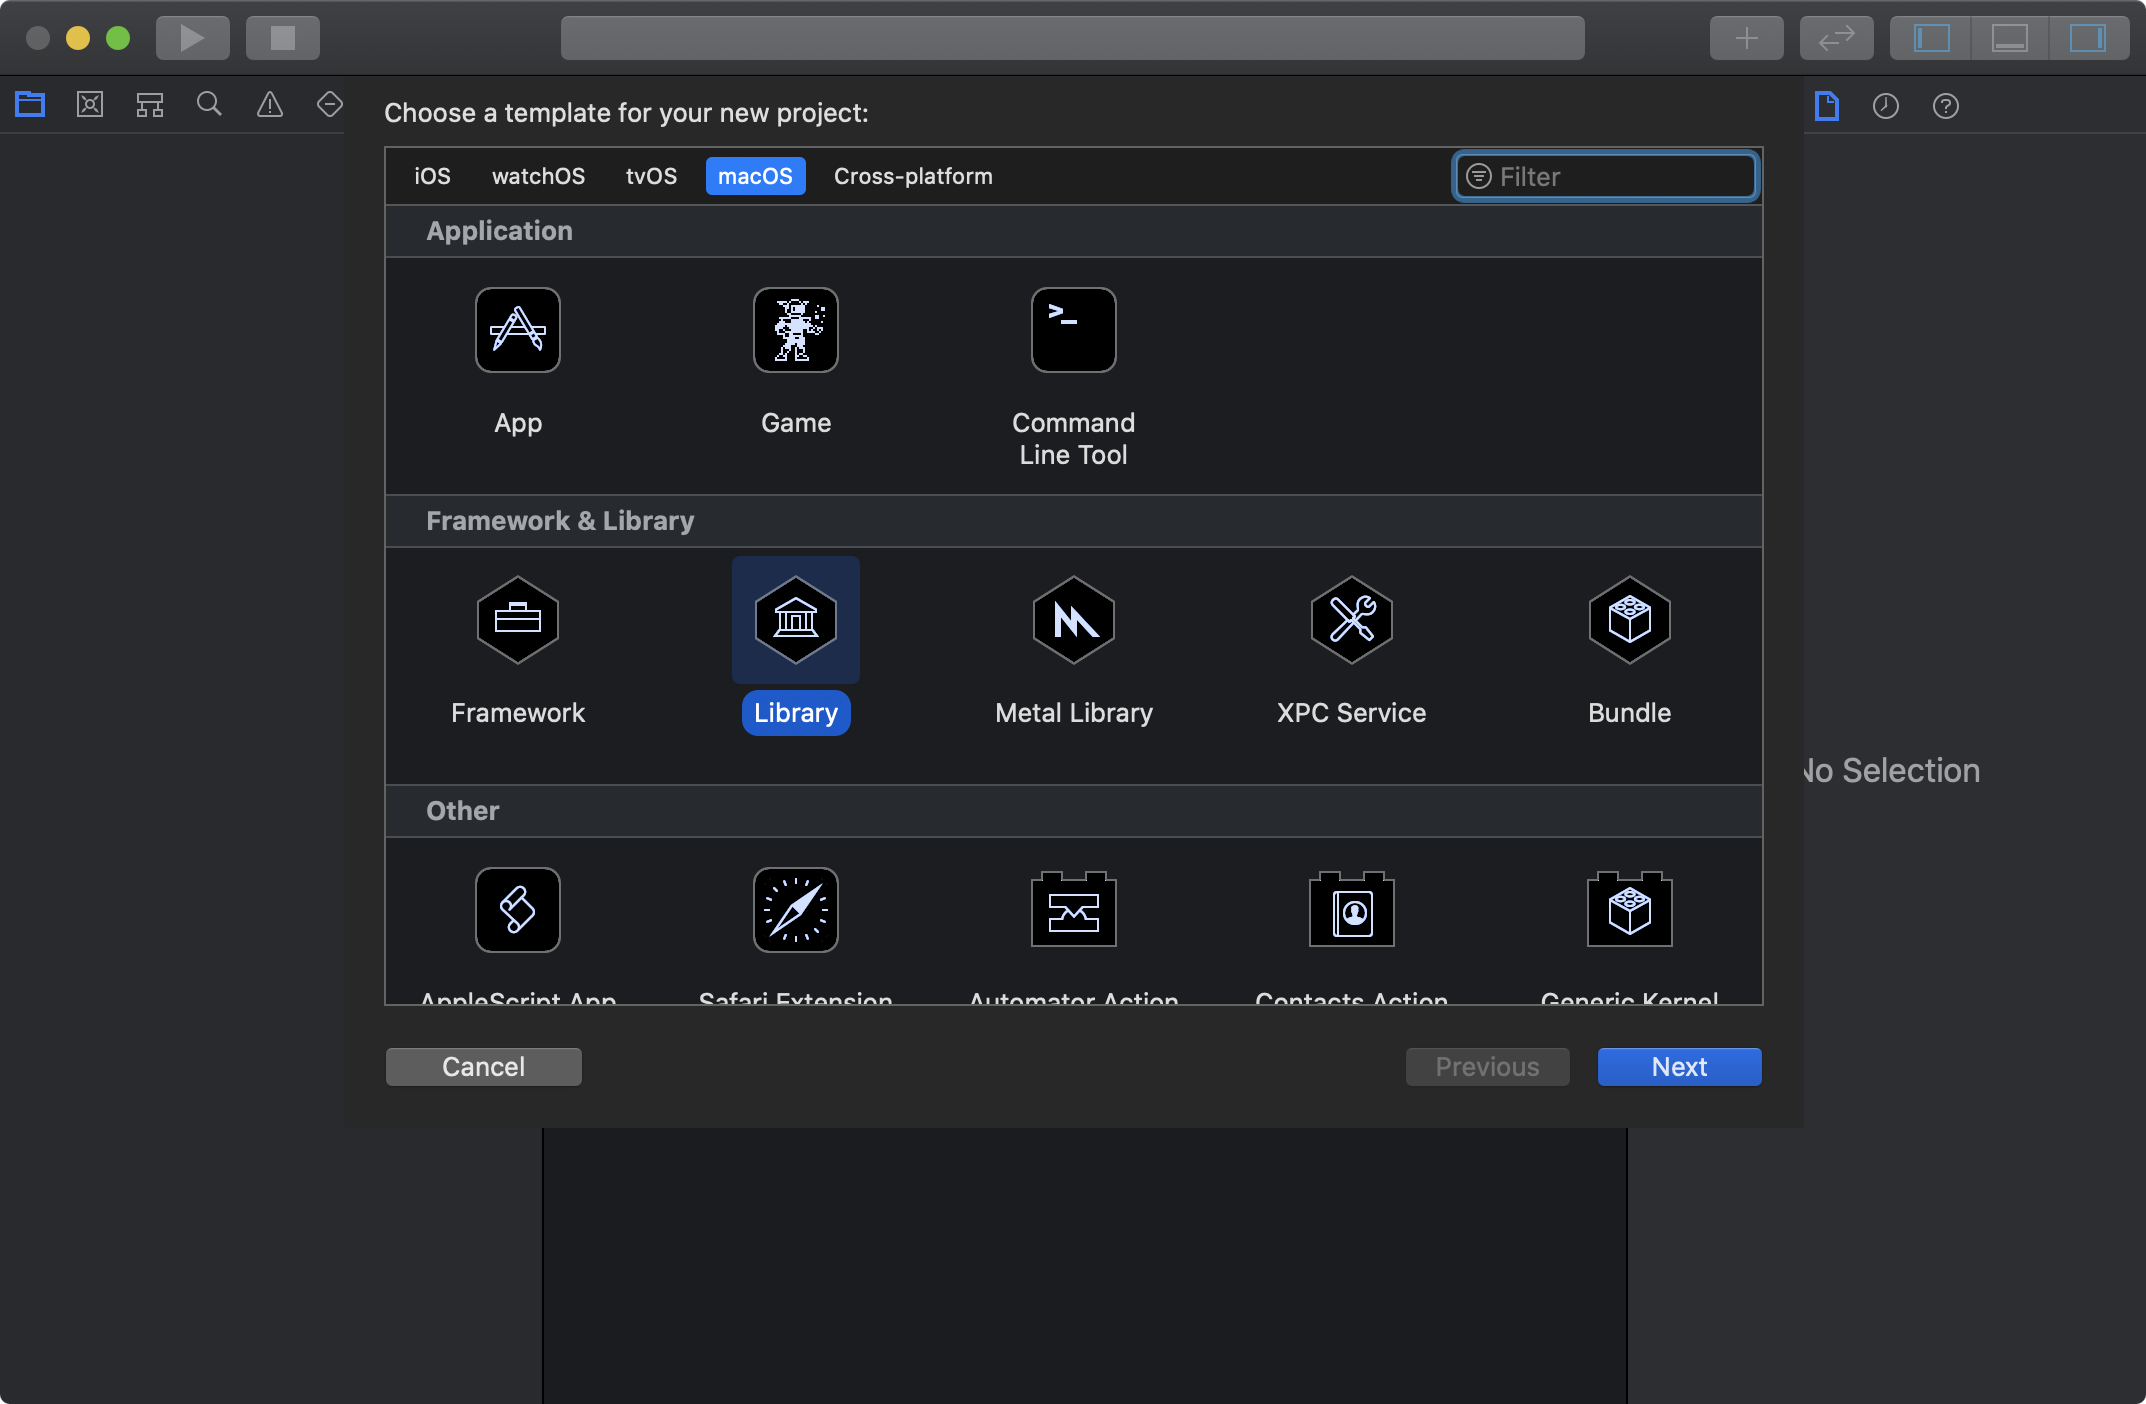
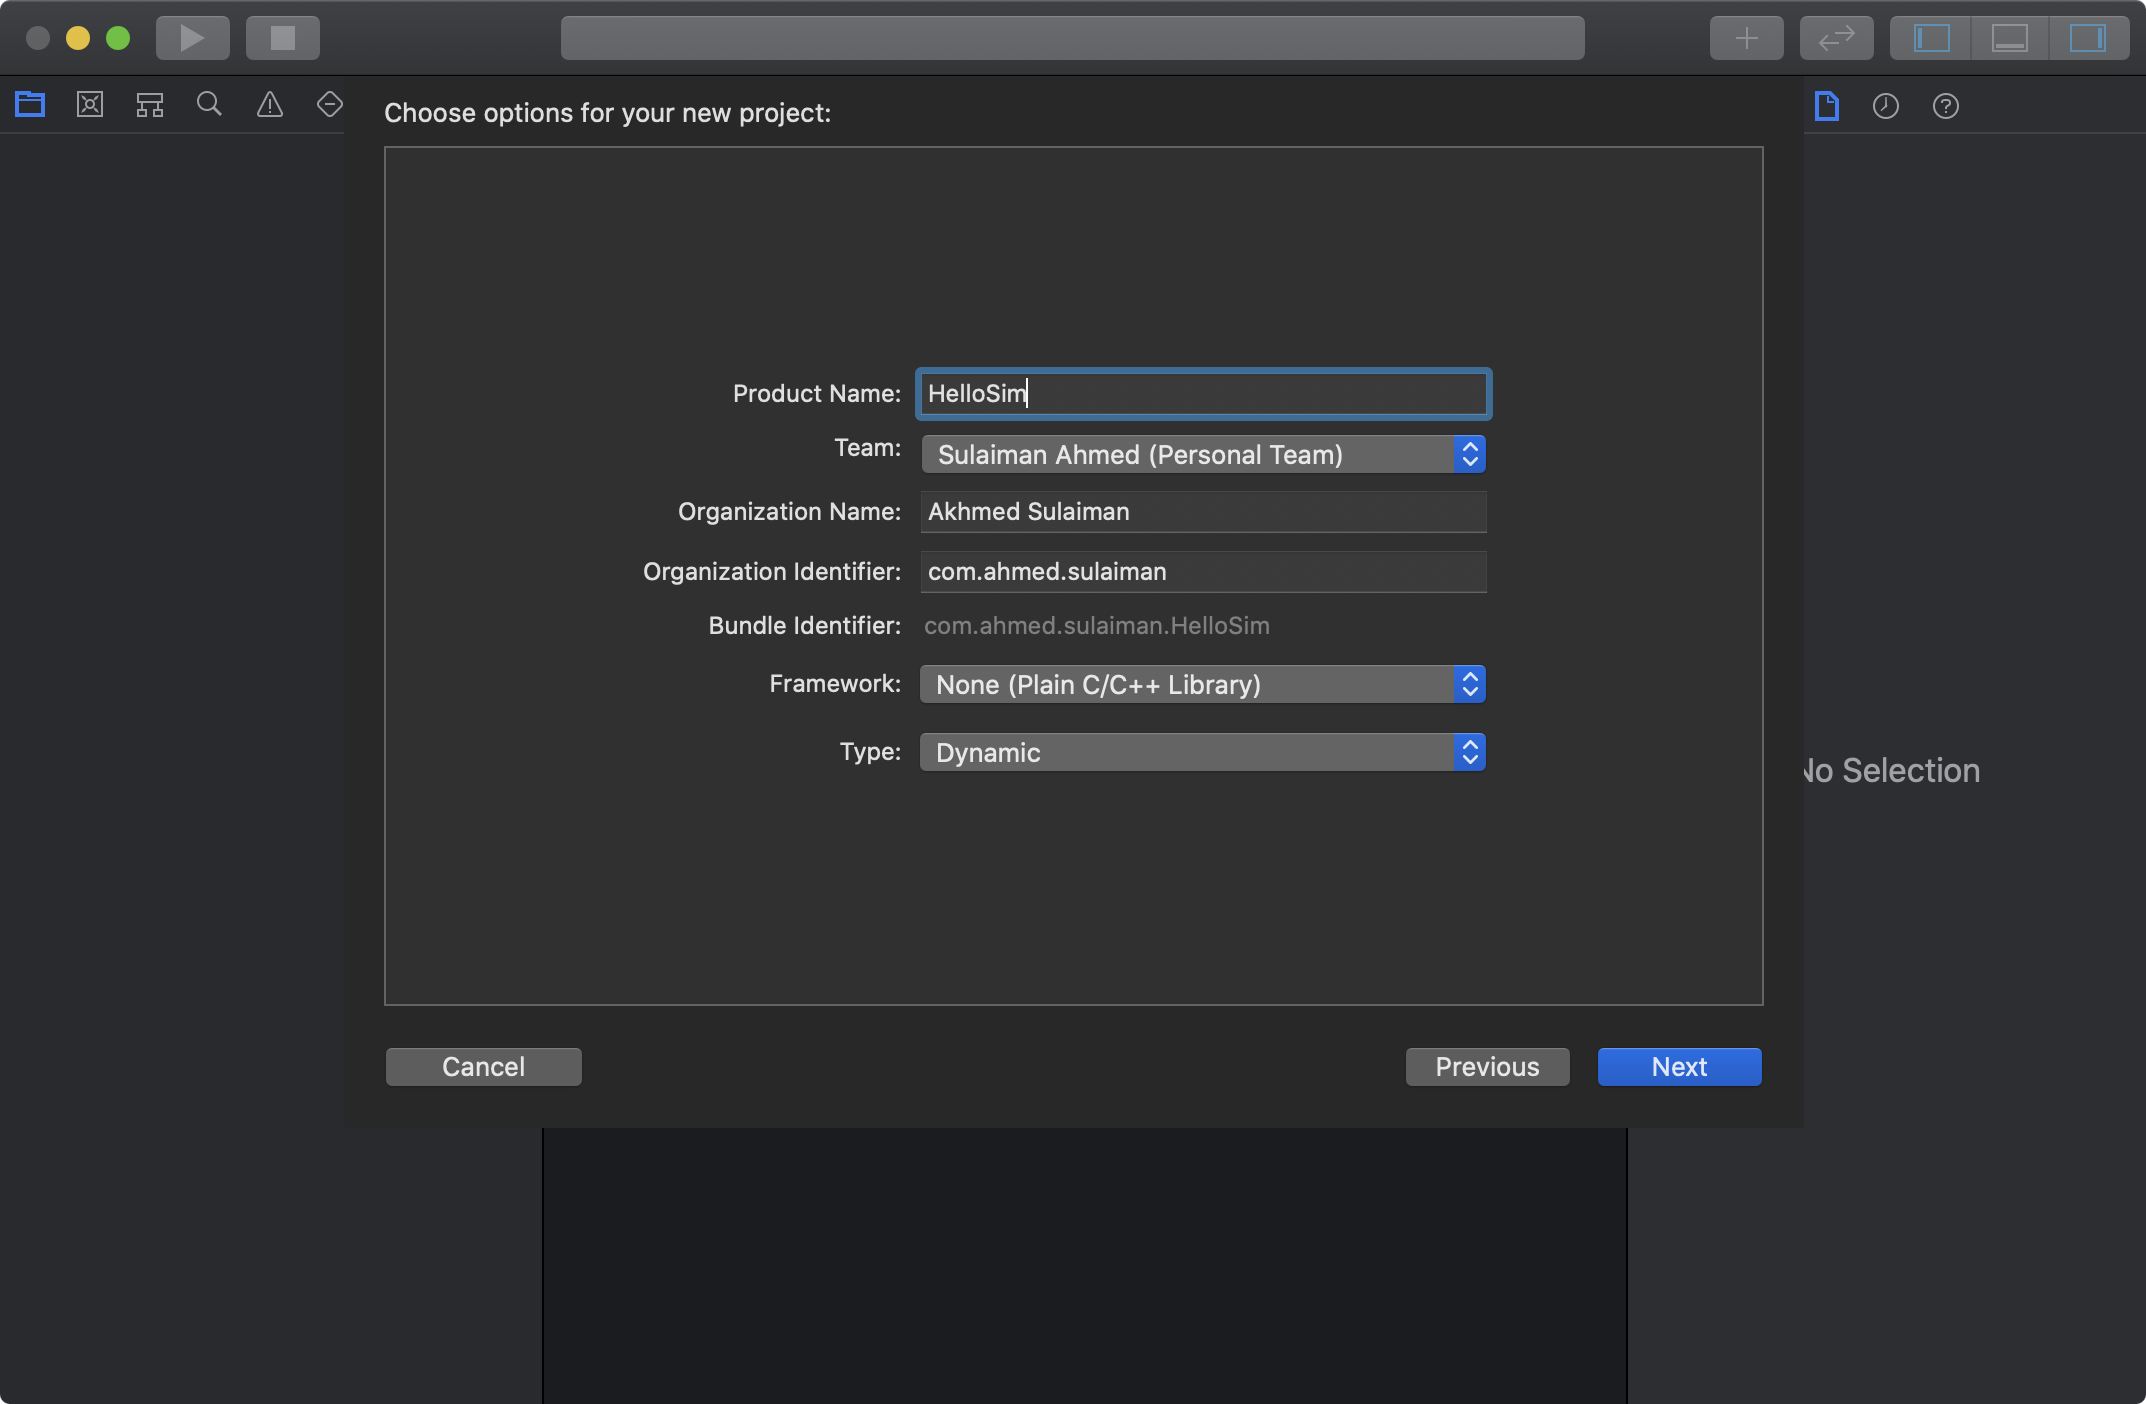
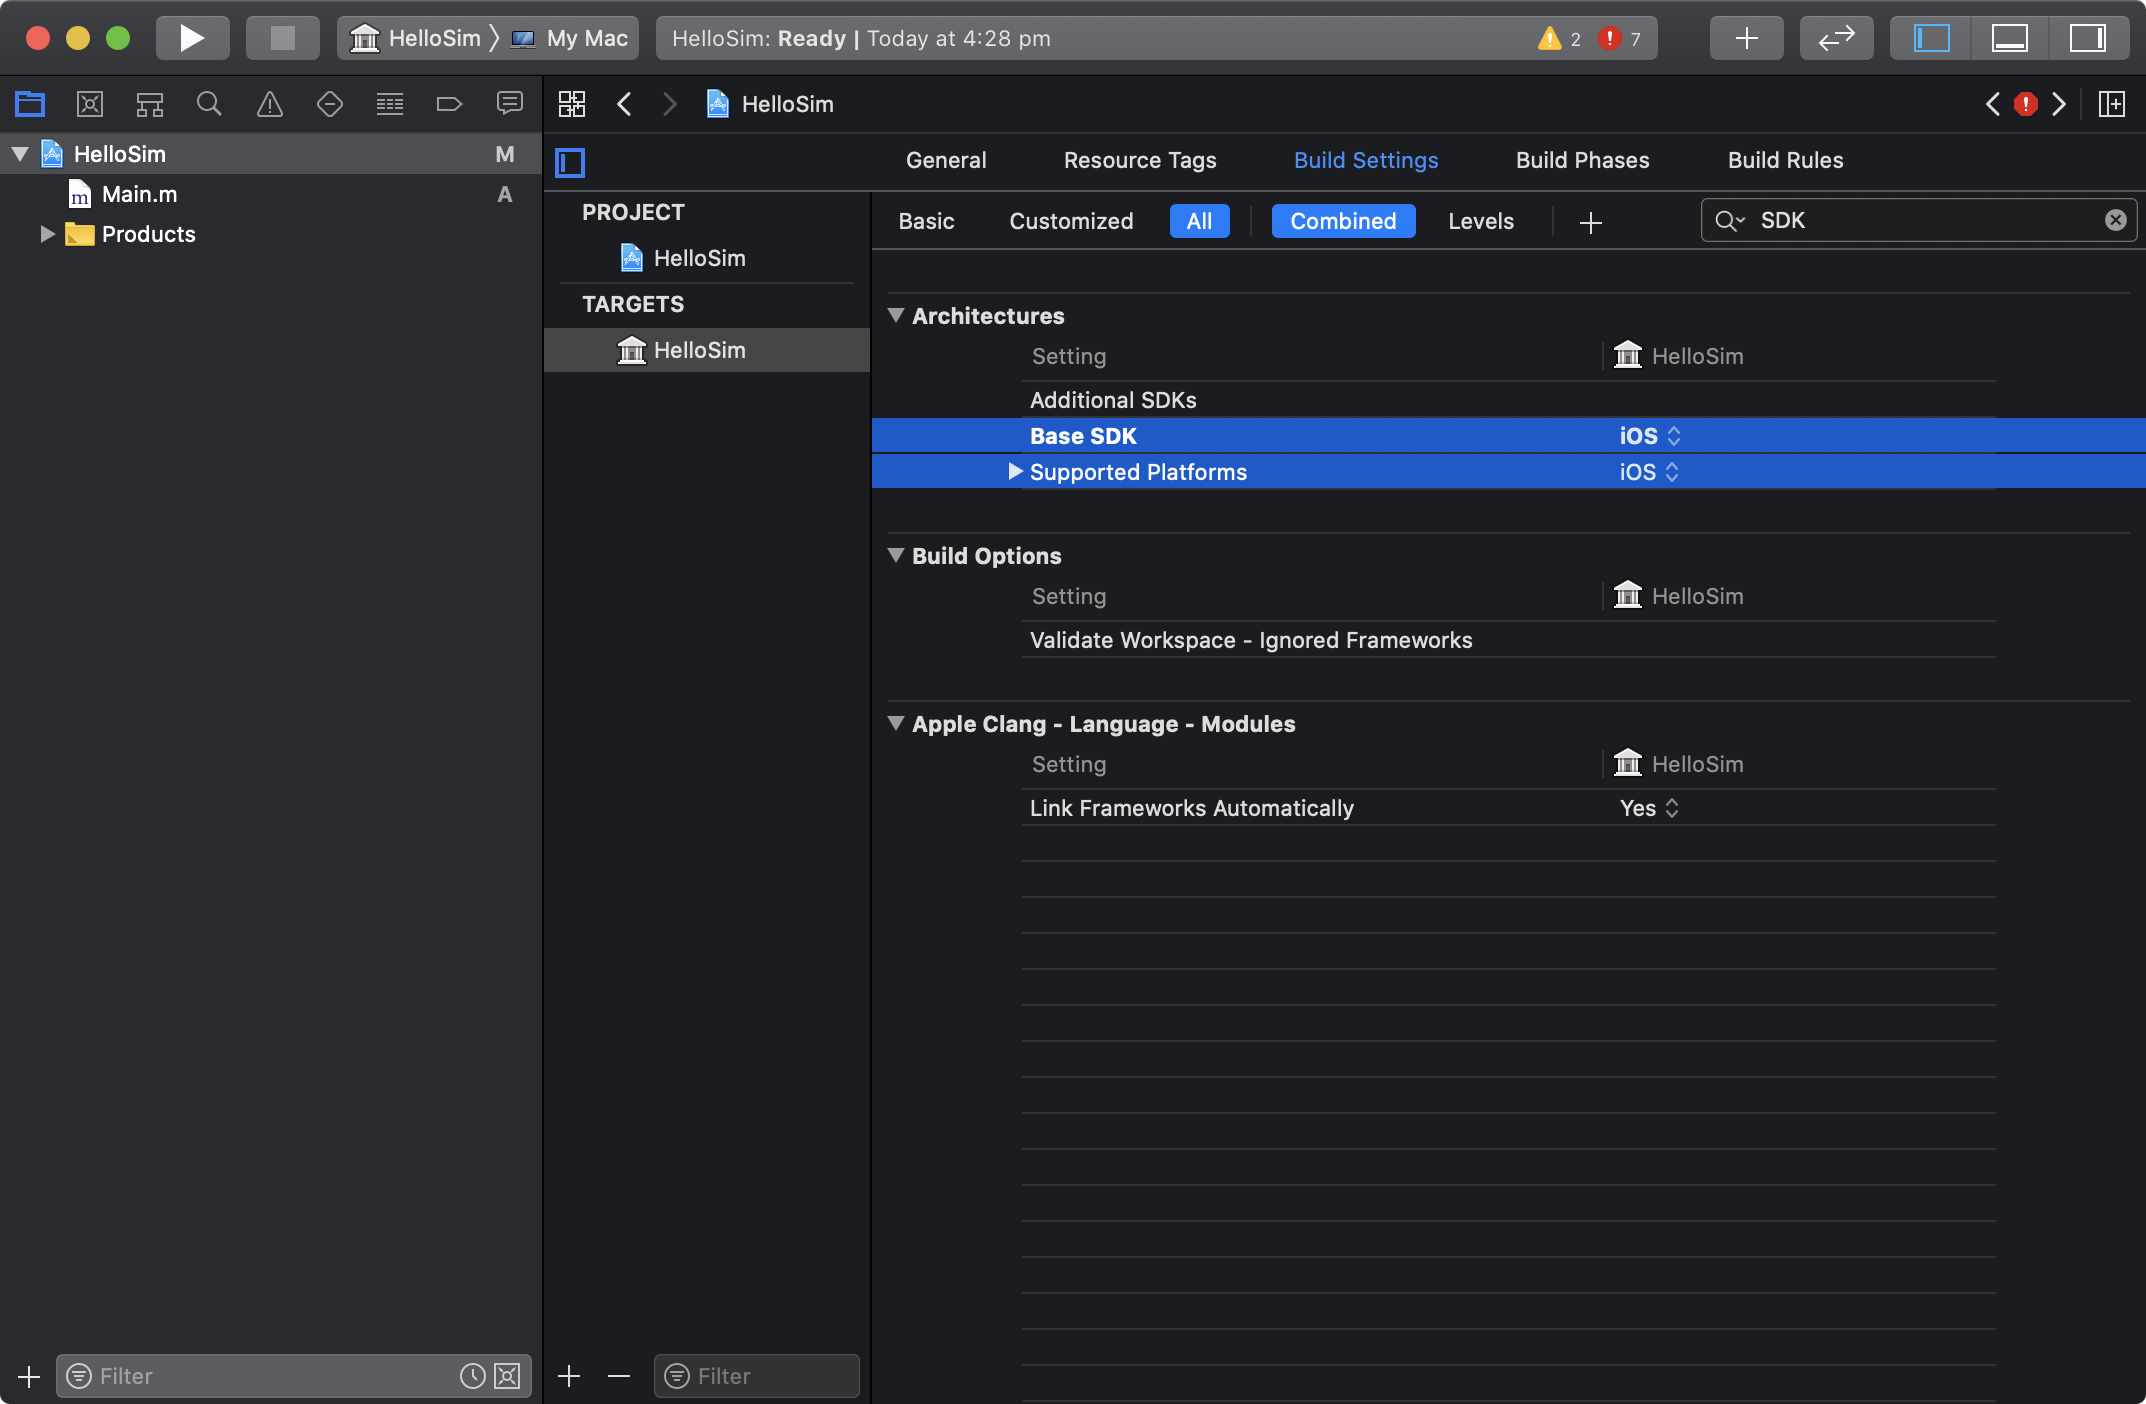
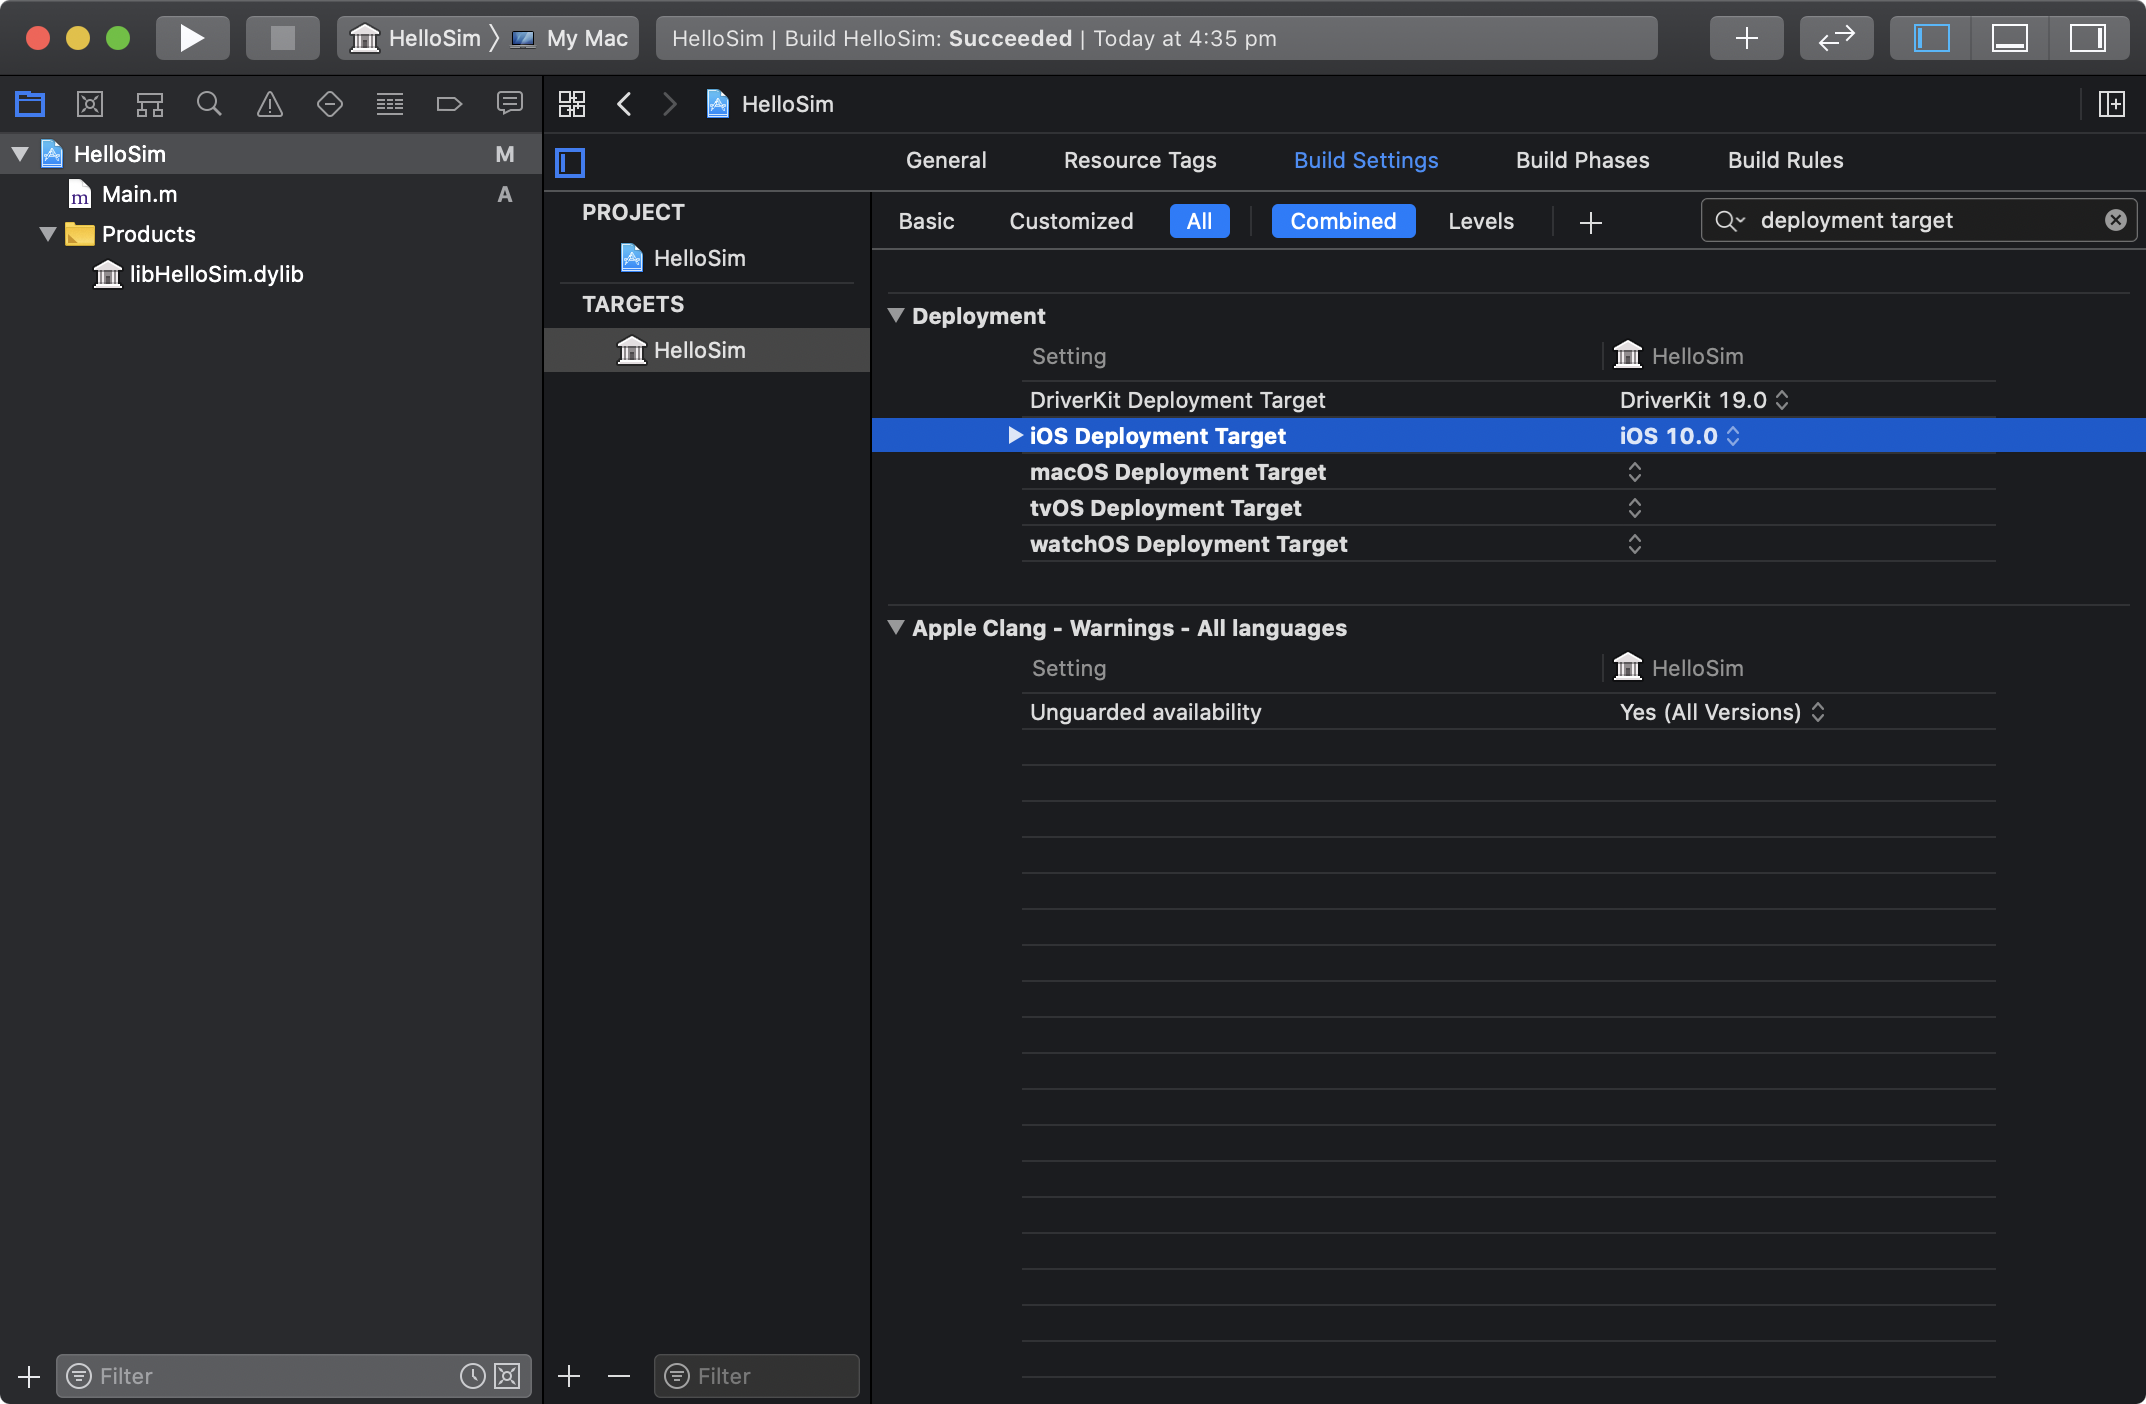
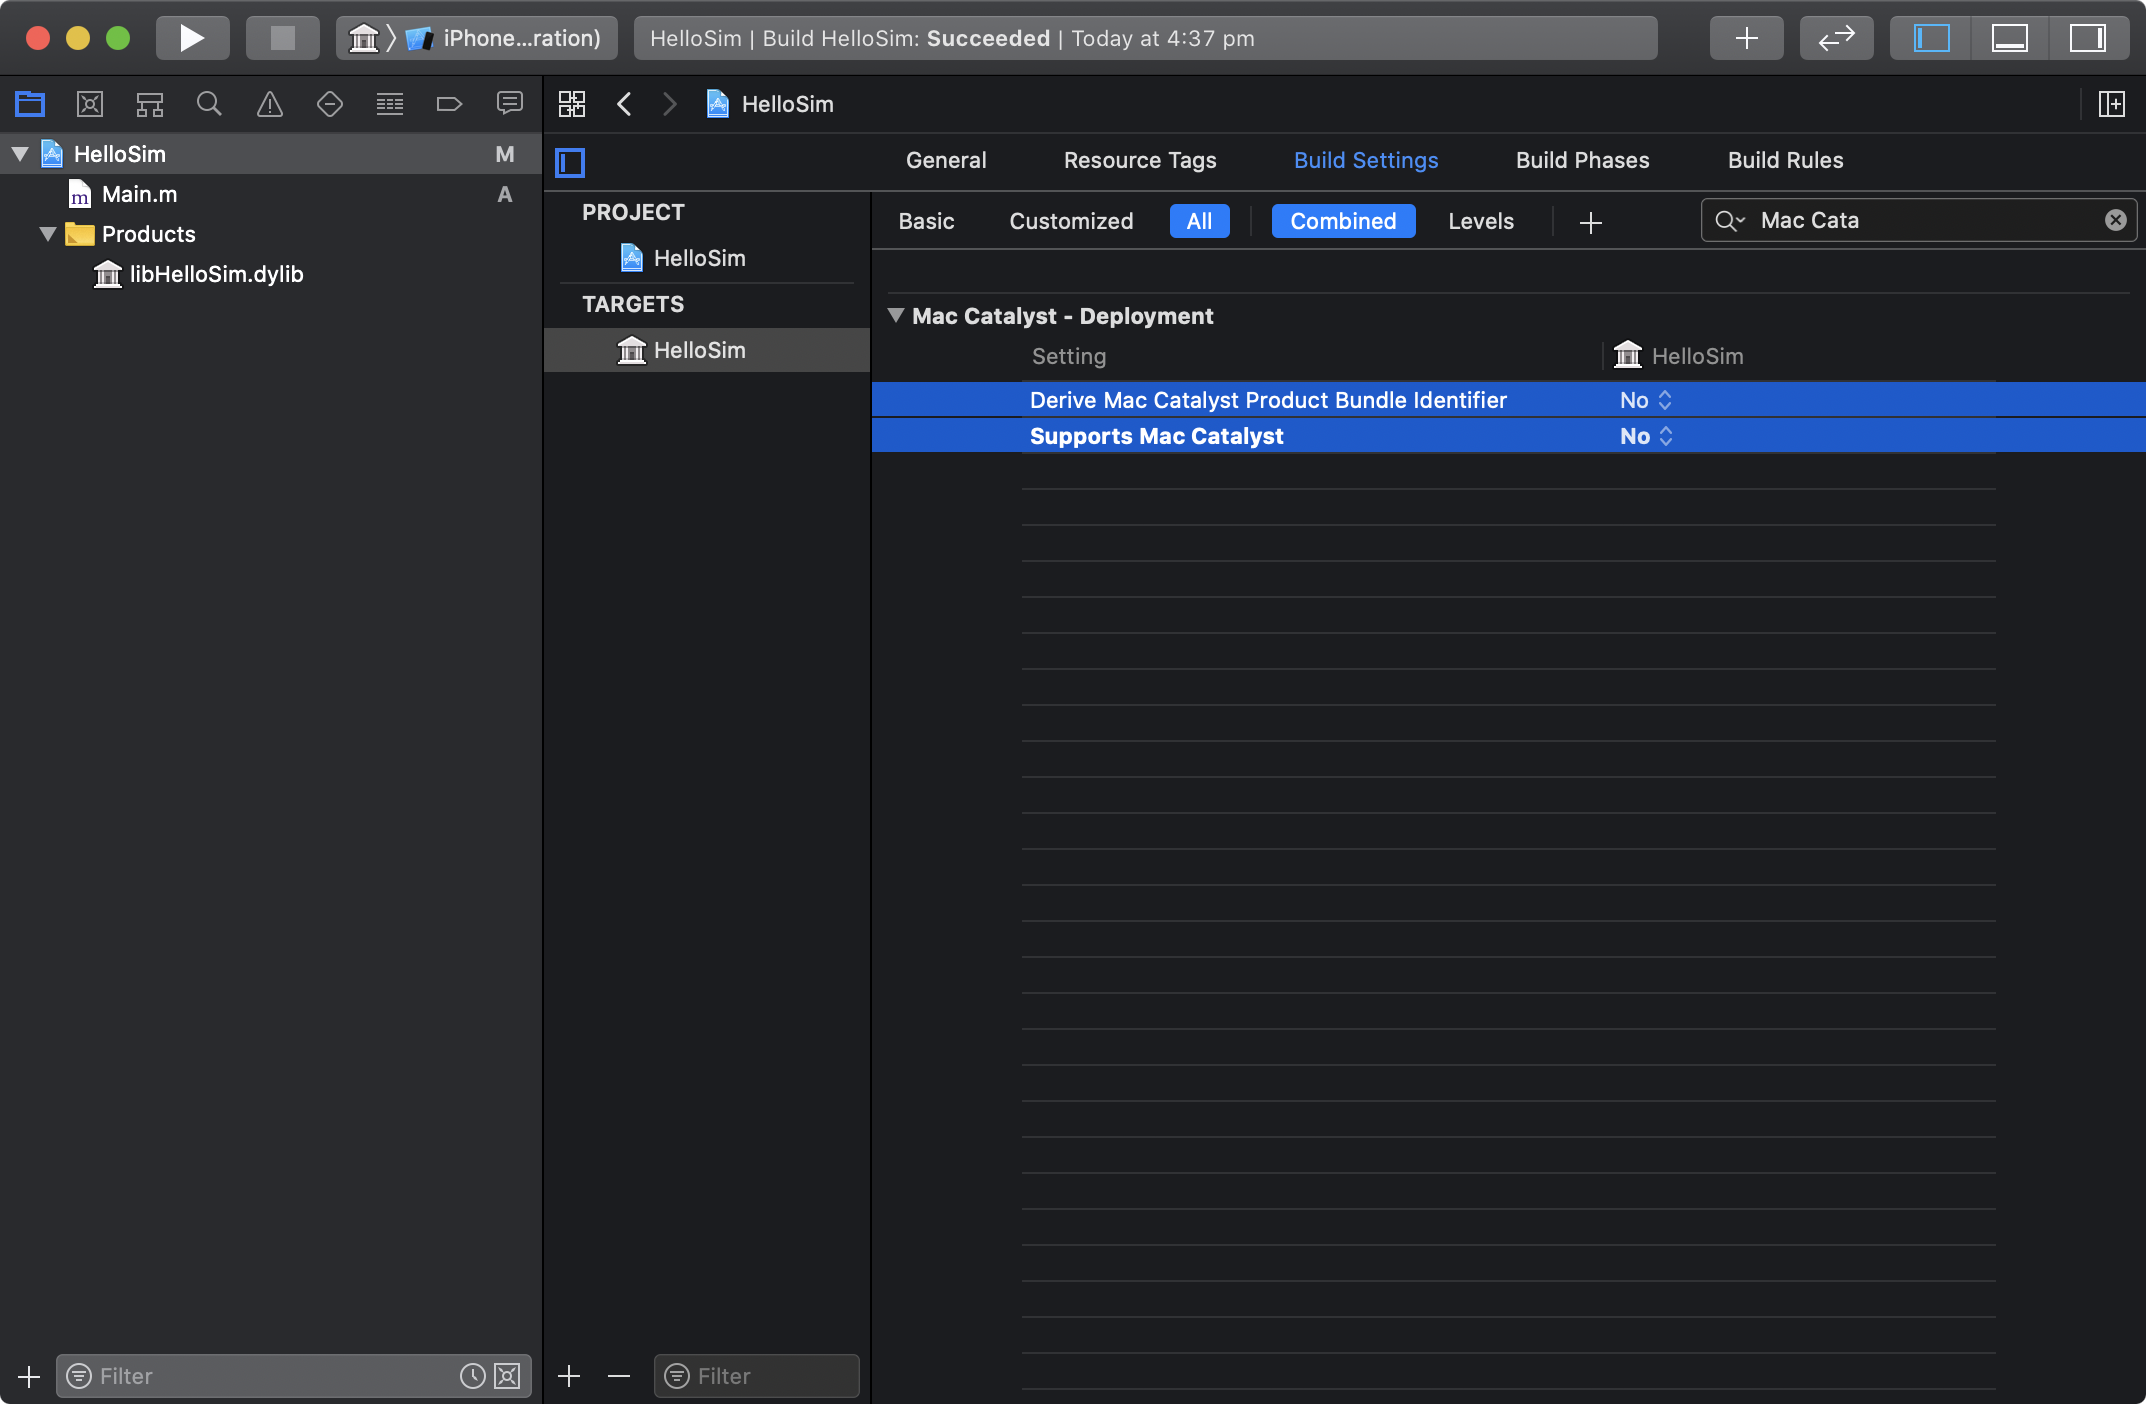
Sadly Xcode doesn’t have a template for iOS dynamic library. In this case, .framework would be overkill. So let’s create a new project using the macOS dynamic library template. Then simply adjust Build Settings according to screenshots below.
Next, let’s create a new Main.m file to define a starting point for our library. There are multiple ways how you can do this for the plugin. The first way is to define the construction method which will be called automatically, the second is to leverage load method.
In this case, let’s stick to the construction method approach. The GCC and Clang support constructor and destructor attribute defined as __attribute__((constructor)). The attributed method will be called before giving control to main() function.
// Main.m

__attribute__((constructor))
static void pluginDidStart() {
	...
}
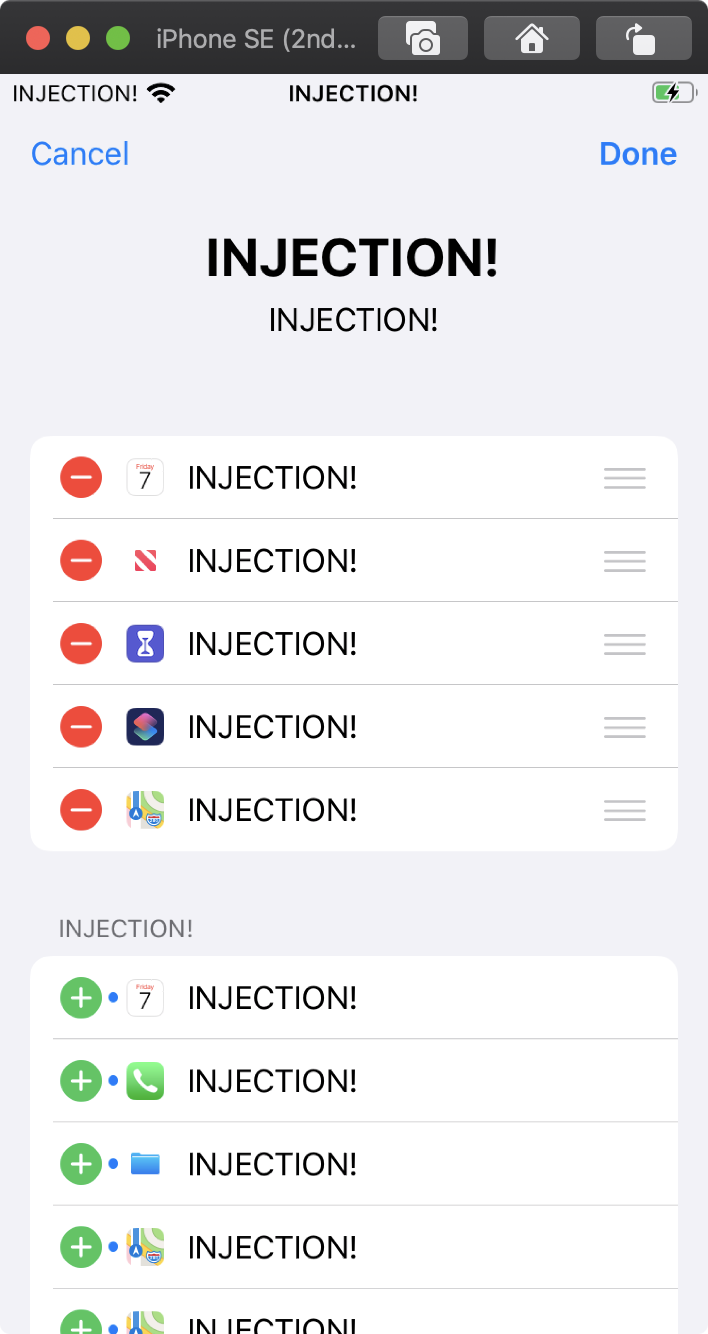
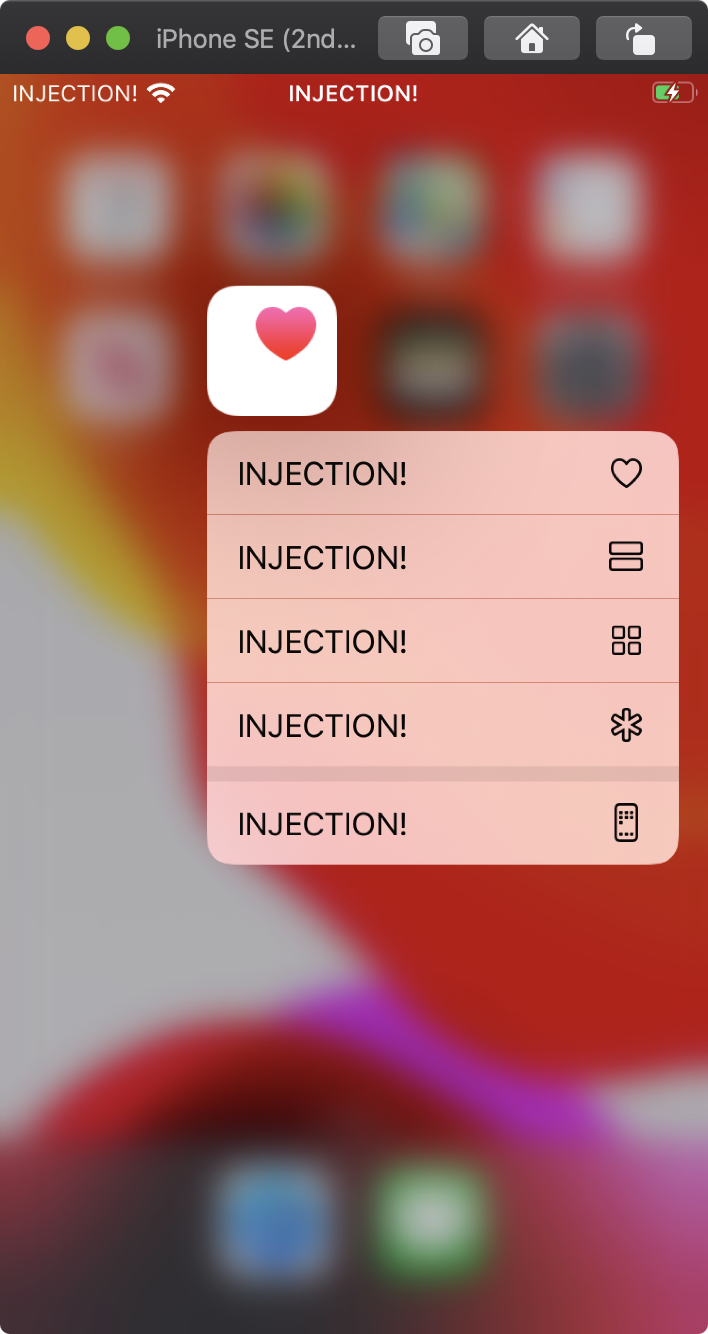
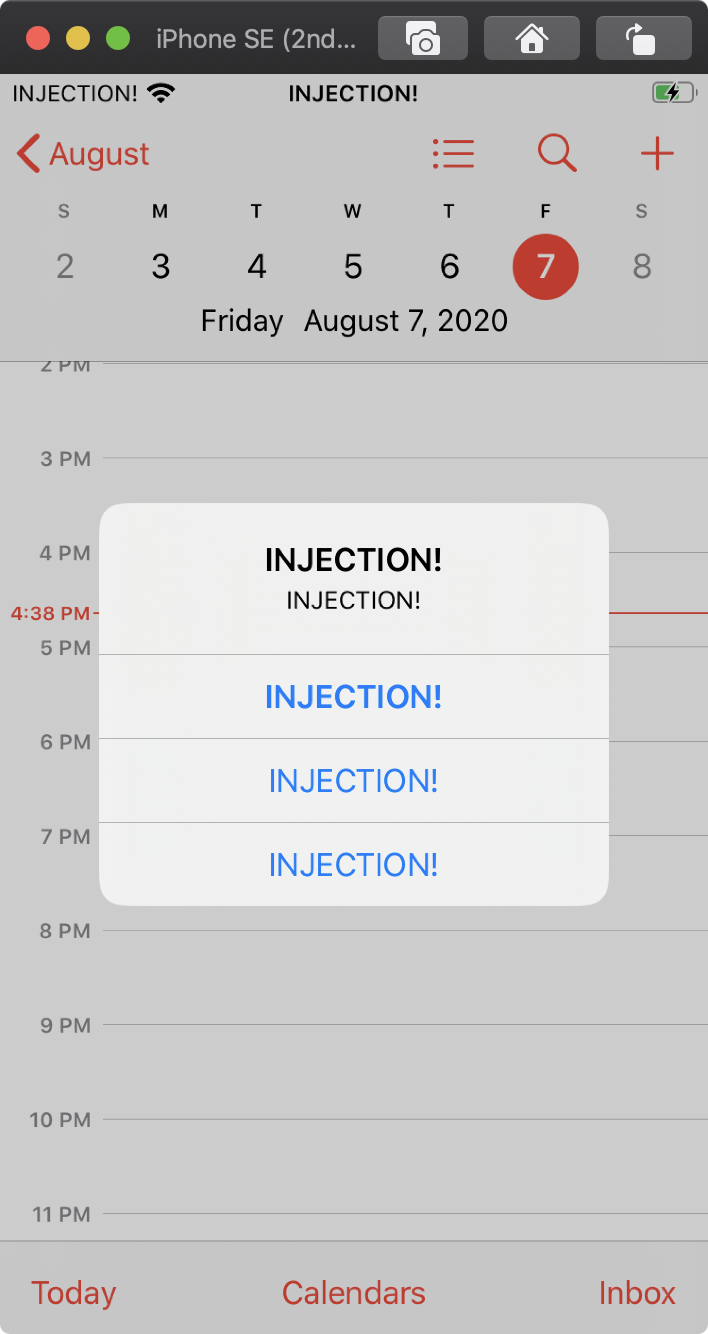
For example’s sake, let’s swizzle UILabel setText: method. This will replace all the UILabel with our defined content. It’s useless but demonstrates the future potential.
// Main.m

// Adding necessary frameworks, UIKit for UILabel and objc/runtime.h
#import <UIKit/UIKit.h>
#import <objc/runtime.h>

// Adding UILabel category
@interface UILabel (Swizzle)
@end

@implementation UILabel (Swizzle)

// Modify dispatch-table and replace original Selector/Implementaiton with alternative one
+ (void)load {
	static dispatch_once_t onceToken;
	dispatch_once(&onceToken, ^{
		Class class = [self class];

		SEL originalSelector = @selector(setText:);
		SEL swizzledSelector = @selector(alt_setText:);

		Method originalMethod = class_getInstanceMethod(class, originalSelector);
		Method swizzledMethod = class_getInstanceMethod(class, swizzledSelector);

		method_exchangeImplementations(originalMethod, swizzledMethod);
	});
}

- (void)alt_setText:(NSString *)text {
	// Remember, calling alternative selector leads to original implementation
	[self alt_setText:@"INJECTION!"];

	// Calling [self setText:@"..."] will lead to infinite loop.
}

@end
Build the library and your plugin is done. The only thing that’s left is to upload it into the iOS Simulator. To do that you need to have Simulator up and running. Launch it in Xcode or via the terminal.
$ open -a Simulator
Now it’s time for the exciting part – injecting the library.
Actual injection happens with the following simctl command:
$ xcrun simctl spawn booted launchctl debug system/com.apple.SpringBoard --environment DYLD_INSERT_LIBRARIES=path/to/dynamic/lib.dylib
Let me explain it in details:
bootedindicates that we’re sending a request to currently active Simulatorlaunchctl debugcommand allows us to configure a certain process for its next launch and more importantly set an environment variable.system/com.apple.SpringBoardis a process identifier. In this example, we’re injecting into SpringBoard but you can inject in any process running on Simulator.--environment DYLD_INSERT_LIBRARIES=...is setting an environment variable with the path to our dynamic library
After execution, the command should return: “Service configured for next launch”. Now we need to restart the process with:
$ xcrun simctl spawn booted launchctl stop com.apple.SpringBoard
That’s it. As you can see from screenshots below the library has been successfully injected.
iOS Simulator Tools
I’d also like to shout out to some of the great products that can enhance the iOS Simulator workflow. I expect all of them use simctl or even dynamic libraries in one way or another.
-
At the moment, Flawless App is not availabe for downloads or purchase. If you’re curious, feel free to read those articles: Review: Flawless App by Hacking with Swift, Flawless App Tutorial and Review by Peter Witham or How Flawless App Helps You Become a Better Designer and Developer on AppCoda. ↩